Need to know how to fix a cracked headlight? This article will take you through 6 easy steps for fixing your cracked headlight lens.
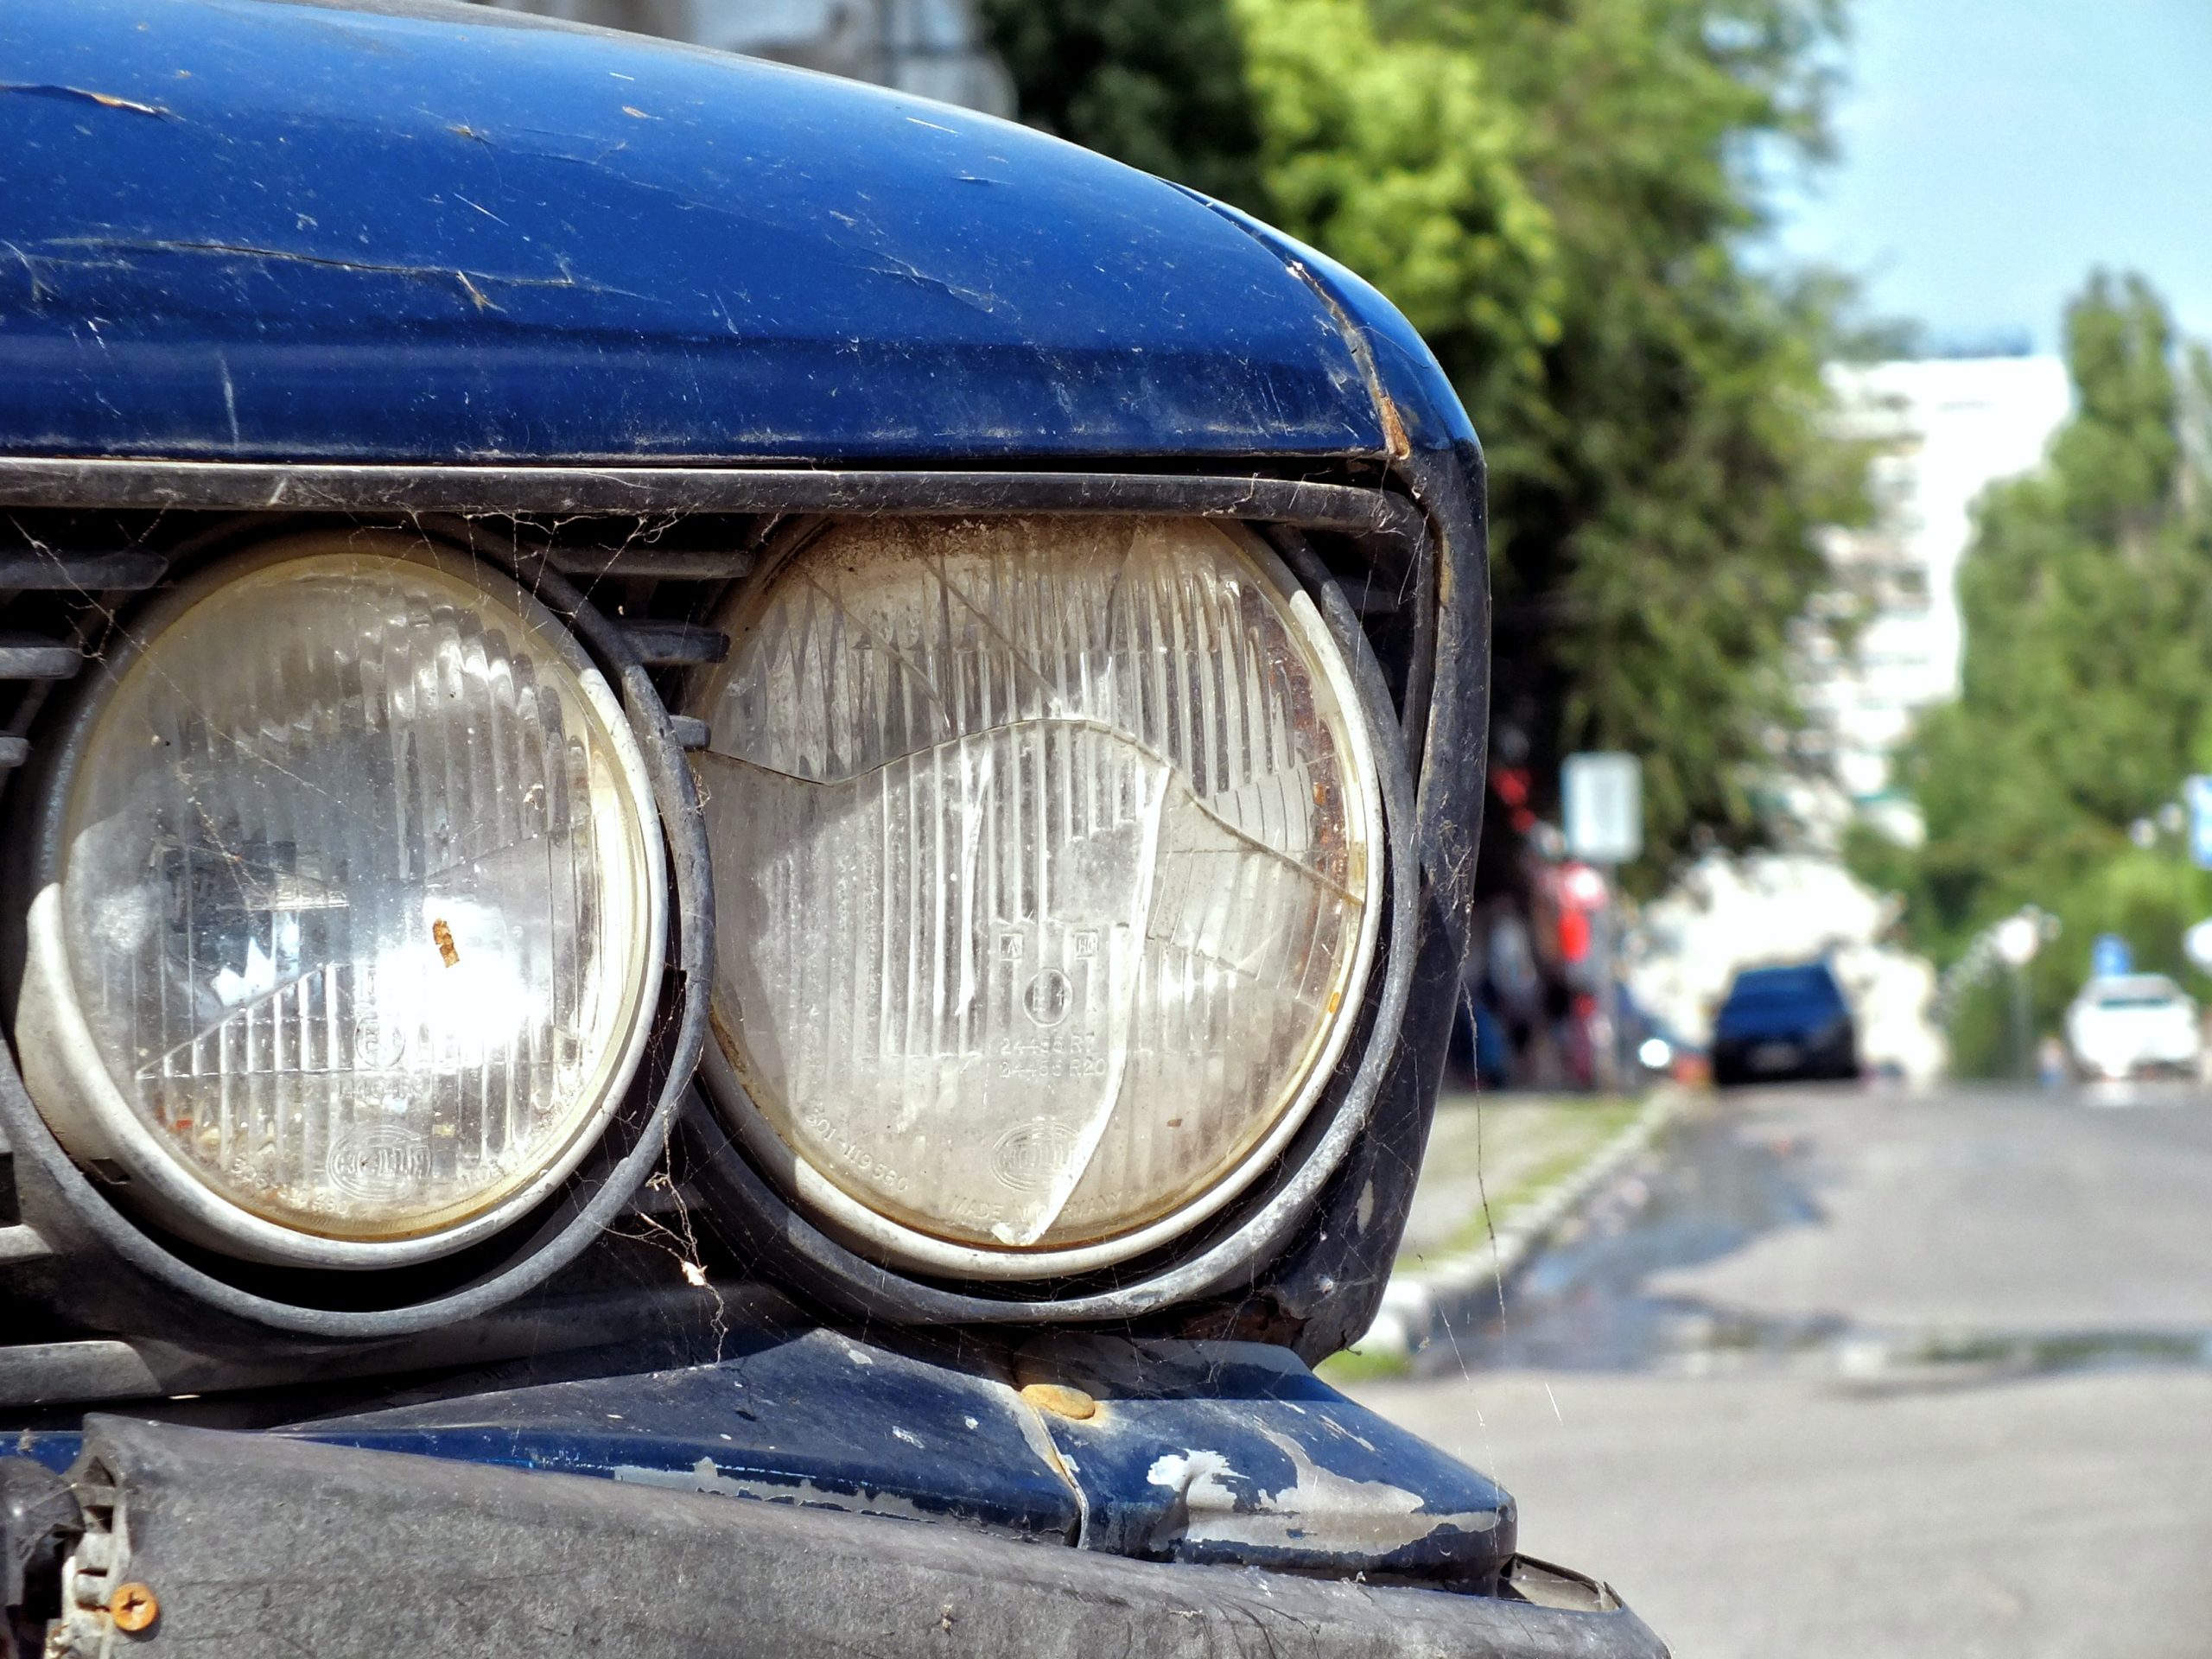
Cracked headlight lenses can be a major issue for drivers, as it reduces visibility and can even affect the overall look of the vehicle. Some cracks will also allow moisture to enter the headlight housing, causing it to look foggy and reducing light output.
Luckily, there are some simple steps you can take to fix the cracked lens and restore your vehicle’s headlights back to their original condition.
Tools & Products Needed
- Headlight lens repair kit
- Plastic lens polishing compound
- Sandpaper
- Sanding block
- Latex gloves
- Applicator brush
- Masking tape / Painter’s tape
- Clear plastic epoxy or silicone
- Headlight lens coating / sealant
How to Fix a Cracked Headlight in 6 Easy Steps
Step 1: Purchase a Headlight Repair Kit
The first step in repairing a cracked headlight lens is to purchase a headlight repair kit that includes all the necessary supplies and tools. These kits typically include a plastic lens polishing compound, sandpaper, sanding block, gloves, and applicator brush. Once you have all these items gathered together, it’s time to start the repair process.
Step 2: Clean the Headlight Lens
Remove any dirt or debris from around the crack on your headlight lens. Any dirt left behind will interfere with the adhesive and make the repair more difficult. Once you have cleaned away any debris, use sandpaper to lightly sand down any rough edges created by the crack. Then use a soft cloth to clean off any dust or residue left over from sanding.
Step 3: Tape Off the Area Surrounding the Headlight Lens
To ensure the painted area around the headlight is protected during this procedure, apply masking tape around the headlight lens. Masking tape is safe for car paint and will not leave a residue.
Step 4: Fill Cracks with Clear Plastic Epoxy
Put on latex gloves. Carefully follow the instructions on the clear epoxy container. Fill each crack with the epoxy. It will not usually take very much to fill the crack. While the epoxy is still wet, scrape excess away with a credit card or similar. Allow the epoxy to dry completely before continuing.
Step 5: Polish the Headlight Lens
Next, prepare your plastic lens polishing compound according to instructions provided in your kit and apply it directly onto the affected area of the headlight lens using an applicator brush. This compound should help fill in any cracks or gaps created by the damage caused by a cracked lens. Let this sit for at least thirty minutes before wiping away any excess polish that may have been left behind with a soft cloth or paper towel.
Step 6: Apply a Protective Coating
Once you’ve completed these steps, it’s time to finish off your repair job with some added protection for your headlight lens. To do this, spray-on protective coating will provide an additional barrier of protection against future cracking and damage caused by dirt and debris on roads as well as everyday wear-and-tear from driving conditions on highways and other roads over time. Apply this evenly across your entire headlight lens for best results and let dry completely overnight before reattaching screws if necessary for assembly.
After allowing plenty of time for drying overnight, you should have successfully fixed any cracks within your headlight lens and restored them back to their original condition! Following these simple steps make sure that you get longer life out of your vehicle’s headlights while also maintaining its safety level on roadways by providing better visibility during nighttime driving hours.
FAQs
Is it illegal to drive with a broken headlight lens?
In most places, it is illegal to operate a vehicle with a broken headlight lens. Depending on the severity of the damage and the jurisdiction in which you are driving, the fines for doing so can be steep.
Not only that, but having an inoperative headlight severely reduces your visibility and safety on the road, which can lead to serious risks to yourself and other drivers. To ensure optimal visibility, you should replace or fix a broken headlight lens as soon as possible.
No matter how you address the broken headlight lens, it is important to be aware of any local laws or regulations that apply. It can result in hefty fines if you are caught driving with an inoperative headlight.
Additionally, you should always check your headlights regularly and make sure they are working properly before getting behind the wheel. Taking the time to inspect your headlights is an easy way to ensure you stay safe and within the law.
How much does it cost to fix a cracked headlight?
The cost to fix a cracked headlight depends on the type of repair needed and the parts required. Depending on the severity, it could cost anywhere from $50 to over $200 for a single headlight. If there is just a crack in the lens, it may be possible to replace just the lens for about $50 to $100.
If the headlight housing is cracked, then it may require replacing the entire headlight assembly which can cost anywhere from $100 to over $200. It is important to get a professional to inspect and repair the headlight as DIY repairs often result in further damage and increased costs.
How to seal a cracked headlight?
One of the most common issues with headlights is cracks, which can occur due to age, bumps, or flying debris while driving. It is important to repair a cracked headlight as soon as possible in order to keep your car safe on the roads and maintain its aesthetic value. Repairing a cracked headlight requires some basic tools, such as a flathead screwdriver, duct tape, sandpaper, clear silicone sealant and a few other supplies.
First, you need to turn off your headlights. Begin by using sandpaper to lightly sand around the affected area until smooth. This will provide an ideal surface for your silicone sealant and make sure that the sealant bonds correctly with the headlight material. Then apply the clear silicone sealant along both sides of the crack so that it’s fully sealed up. Take care not to get any excess sealant on any other headlight surfaces as this can affect visibility when driving at night. Allow it plenty of time to dry completely before continuing – this can often take several hours depending on weather conditions and temperature.
Finally, use a flathead screwdriver to carefully press down along both edges of the crack so that you’re sure it’s well sealed up and secure. It is also important to check the operation of your headlights once this process has been completed – if there is still light leakage from the repaired area then consider applying more sealant in order to ensure complete coverage and protection for future road trips.
How much does it cost to replace a broken headlight?
The cost of replacing a broken headlight will depend on the make and model of your car, as well as where you take it to get fixed. Generally, the cost for labor will be anywhere from $50-$100, plus the cost of the replacement headlight itself. The exact price can vary depending on what type of headlight you need. For example, if your car requires an LED headlight, you may pay more than if it was a conventional halogen bulb. Additionally, you should factor in any additional fees that the mechanic may charge for their work. New headlight housings range from hundreds to thousands of dollars.
It is important to note that simply replacing a broken headlight does not always ensure that it will match the light emitted from your other working headlights. In some cases, drivers have noticed an inconsistency in lighting between the two sides of their car after only replacing one headlight – this is because auto manufacturer’s use different types and wattages for each side which can not be replicated when purchasing replacement parts from a store or online retailer. To ensure that both headlights are emitting light with consistency and accuracy, you may want to consider getting them professionally adjusted to match each other – this service can cost extra but is worth considering if you would like perfect visual symmetry with your headlights.
Overall, replacing a broken headlight can be an easy and affordable task. Consider what type of bulb is required and ask about any extra fees before committing to a repair shop so that you know exactly how much it will cost upfront. It’s also worth asking about potential adjustments to ensure that both lights are aligned correctly afterwards so that they are emitting light evenly down the road.
How to remove condensation from a headlight?
Removing condensation from a headlight is not always an easy task. However, there are several steps that can help to minimize the amount of condensation and ensure optimal visibility when driving in dark and low-visibility conditions.
The first step to removing condensation from a headlight is to identify the cause. If moisture has collected inside the headlight housing, it could be due to cracks or seals that are allowing water and humidity to enter.
Next allow the headlights to dry completely before fixing the cracks. You might be able to speed up the drying process by using a blow dryer in the back of the headlight housing. Once dry, follow the steps above for fixing the cracks.
Conclusion
Before you spend hundreds or thousands of dollars on a new headlight housing / assembly, you may be able to fix the cracks. Filling the cracks with clear epoxy or silicone and allowing it to dry will close the gap. Sanding and polishing will make the repair look better. Fixing cracked headlights will help keep the moisture out.