Whether you want to boost the aesthetic value of your car or reduce the headlight’s all-too-bright glare, smoking or tinting your headlights is the way to go.
It’s an easy and straightforward process, so you can do it yourself without hiring professional help. Plus, it’s super cheap!
In this article, I’ll show you how to smoke headlights with either tint film or spray paint. I’ll also show you how to calculate the tint’s visibility rating to make sure your smoked headlights are road-legal!
How to Smoke Headlights With Tint Film
Smoking your headlights with tint film has several advantages over spray paint.
The biggest and most obvious advantage is that the smoked effect can be reversed at any time; simply peel the strips away and it’ll be as if you never smoked your headlights in the first place.
Paint doesn’t give you that luxury. Short of replacing the headlights entirely, it’s an irreversible change.
The less discussed advantage is that the tint acts as a protective film over the headlamp’s glass/plastic surface, preventing it from yellowing and from getting scratched.
Finally, it can be applied directly over the headlamp’s surface. With this method, you don’t have to dismantle the assembly and accidentally damage the wiring.
Tinting your headlamp is as straightforward as can be. And since it’s not permanent, you don’t have to worry about messing up if it’s your first time.
Here’s how to do it:
You Need
- High-quality smoke tint
- Glass cleaner
- Disposable gloves
- Toothpaste or baking soda for foggy headlights
- Towel
- Rubber squeegee to push out air bubbles
- Sharp razor blade
- Heat gun or blow-dryer
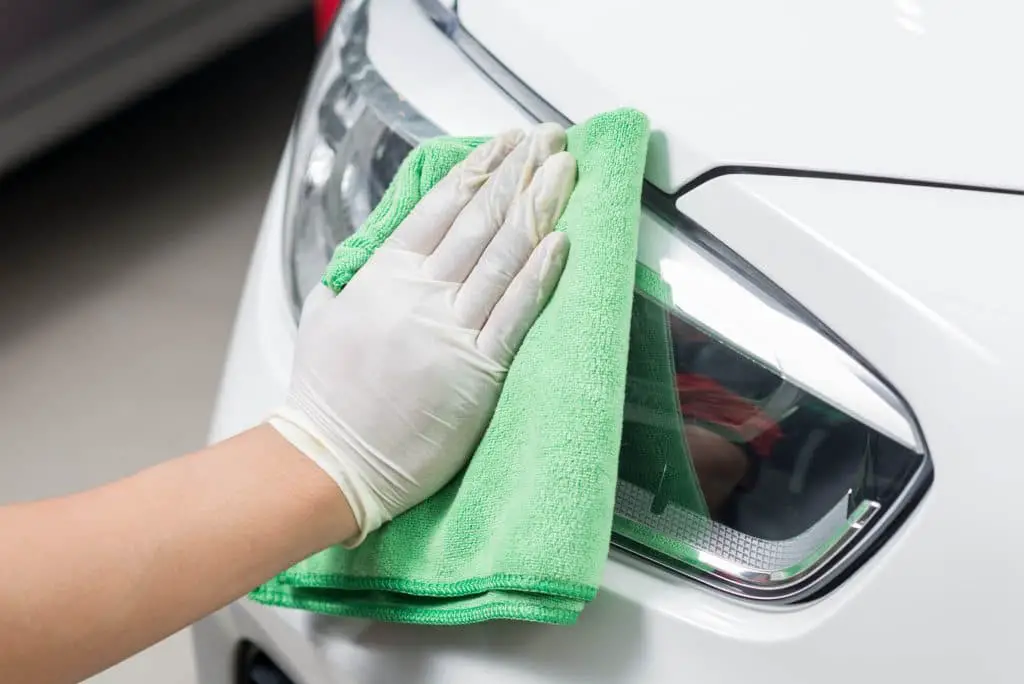
Step 1: Clean the Lenses
Spritz your headlights with Windex or with regular soap and water, and gently wipe away any dirt, rust, dead bugs, and gunk that may have accumulated on the surface. Then, wipe the surface down with a clean, dry rag or towel until it’s 100% moisture-free.
If your headlights are foggy, clean them with a lightly abrasive cleaner like baking soda (mixed with water) or toothpaste. If the fogginess doesn’t go away, use a premium headlight cleaner.
Add a thick amount of cleaner over your headlight lenses and leave it to dry for a few minutes. Then, remove it with a soft brush and wipe it clean.
Step 2: Measure the Headlight Lens
Using a tape measure, measure the approximate length and width of the headlights. Add an additional two to three inches in the measurement to factor in adjustments and minor mistakes.
If you don’t have a tape measure, place the tint directly over the headlight lens and lightly trace the surface of the tint with an erasable marker. Before doing so, wear a pair of disposable gloves to prevent fingerprint marks from appearing on the tint.
Step 3: Cut the Tint
Still wearing gloves, cut the provided dimensions with pair of sharp scissors or a box cutter.
Step 4: Apply the Tint
Spray the headlight lens with a simple shampoo-water solution to lubricate the area. This will allow you to adjust the sheet as necessary.
Gently peel off the backing tape and place the film on the flattest part of the lens. Then, without rushing, work your way towards the curved edges of the lens.
Use a rubber squeegee or stiff cardboard to ease out the air bubbles from one side to another. Push out the trapped air and water underneath the film with smooth, strong strokes. Poke out the remaining air bubbles with a fine needle.
If you make a mistake during the application, don’t worry. Unless the tint is damaged, you don’t have to start over. Gently strip the film off, spray the surface area with a shampoo-water solution, and reapply until you’re satisfied with the application.
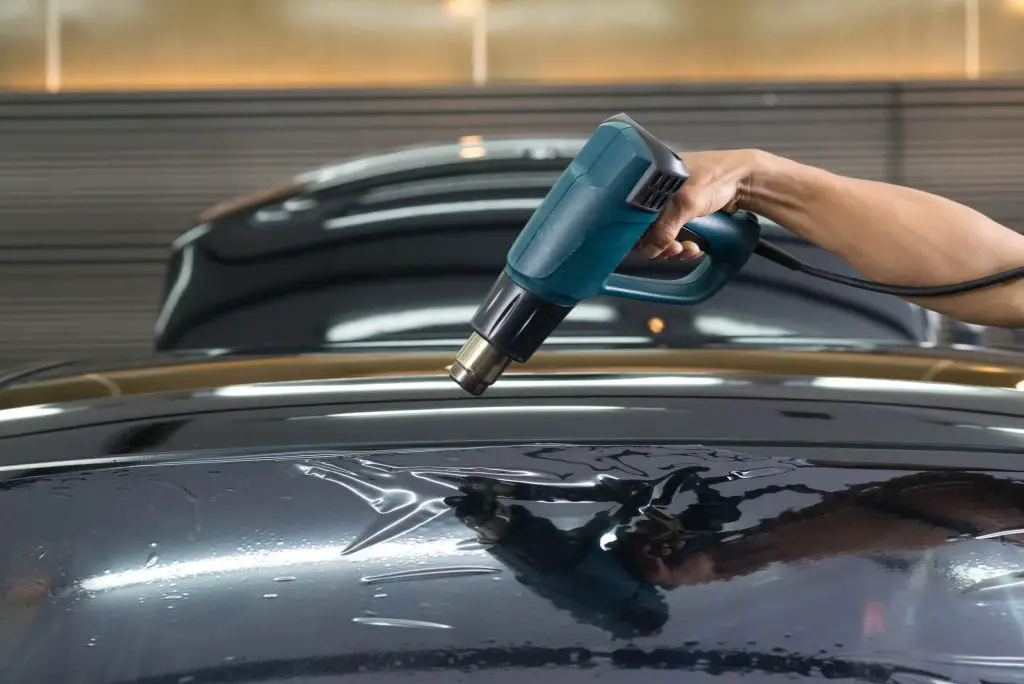
Step 5: Smooth Out Curved Areas With Heat
Smooth out the curved areas with a heat gun (on low) or a blow dryer (on medium) for two to three minutes. This allows the sheet to soften and properly adhere to the surface of the headlight. It’ll also allow you to push out stubborn air bubbles from the tint.
Once done, let the adhesive cool down and settle for four to five minutes.
Step 6: Cut Off Excess Tint
Using a box cutter or sharp blade, carefully trim out the excess headlight tint film. Start with a rough cut then follow it up with a more detailed, accurate trim. Be hyperaware of the surface of your headlights and make sure you don’t scratch it with the razor.
Step 7: Give It a Final Heat Treatment
When you’re happy with the final look, give it a final heat treatment and push out any remaining air bubbles and crease lines. Leave it to dry for three to four hours and don’t meddle with the tint until it’s completely dried up.
How to Smoke Your Headlights With Spray Paint
In this second method, I’ll teach you how to properly spray your headlights with a headlight tint spray. You can use regular spray paint but the results won’t be as neat.
Although risky, spray painting your headlights looks much better than tinting your headlights with lay-on film. It’s a high-risk but high-return situation; as long as you do it right, you’ll be impressed by how sleek the paint looks on your headlights.
Here’s how to do it:
You’ll Need
- Disposable mask and disposable rubber gloves
- High-quality headlight tint spray
- Masking tape
- Clear topcoat spray
Step 1: Dismount the Headlight Lens
To prevent the paint from damaging your car, you’ll first need to completely remove the headlight lens from its socket. Every vehicle has its own method of removing the headlights, so check your guide manual for further instructions.
Step 2: Clean the Headlight Lens
For this step, follow the cleaning process as stated above in the first method.
Use regular soap and water, Windex, or headlight cleaner to remove the dirt, grease, etc. from the lens. If the lens is foggy, use the baking soda/toothpaste method above.
Let the lens dry for up to 15 minutes before proceeding to the next step.
Step 3: Spray the Headlight Lens
Put on your mask, gloves, and any other protective gear you deem necessary. Then, cover the parts you don’t want to spray on with masking tape. As you do that, don’t forget to lay down several newspapers on the floor so the paint won’t ruin your workspace.
Once that’s all set, you’re ready to spray! Using a headlight-specific plastic spraypaint, spray from a distance of about 18 inches or 2 feet. Move the can in a single motion, either around the headlight or from side to side. Don’t linger on one spot; start with a very thin coat.
If you make a mistake during the painting process, you can lighten or remove the paint with a plastic polish or methanol. WD-40 works as well. Don’t use acetone as it’ll eat the plastic. Pour a bit of the solution on a cotton pad and gently rub the paint off.
Step 4: Add a Second Coat (If Necessary)
Let the paint dry for 10 to 15 minutes before adding another coat, but only if you think a second coat is necessary. Remember: paint darkens as it dries.
If the color isn’t dark enough to your liking, add a second coat. Use the same spraying method you’ve used on the first coat.
Step 5: Apply a Clear Top Coat
This step is optional but recommended. Once the paint dries, add a thin layer of clear topcoat to make the end result look more professional.
The topcoat will also serve as extra protection against UV rays and chipping.
Step 6: Let the Paint Dry
Let the paint dry in a cool, dry place, preferably away from direct sunlight. The drying process takes anywhere between 12 to 24 hours, depending on the thickness of your paint.
Step 7: Reinstall the Newly Smoked Headlights
Once the 24 hours are up, it’s time to reinstall your headlights. Carefully remove the masking tape and mount the headlight assembly back onto its original position.
Test the light output before taking your car out on the road. If the lights appear too dim, replace the old lightbulbs with brighter ones.
What Are the Benefits or Advantages of Smoked Headlights?
Smoked headlights are one of the most popular vehicle customization options for car owners, and for good reason. Here are some of the biggest benefits of smoked headlights:
Boosts Aesthetic Appeal
The biggest reason why people smoke their headlights is that it greatly improves the appearance of your vehicle. It can turn a boring, standard car into an elegant beast with flawless smoked detailing. This sets it apart from other cars of the same model.
On top of that, you get a variety of color options. If dark-smoked lenses aren’t your thing, go with light-smoked lenses! You can even choose neon colors to further make your car stick out from the rest.
Reduces Glare

If your car’s headlights are uncomfortably bright, smoked headlights are your answer.
Smoked headlights lower the brightness and glare of your headlights. They’re kind of like sunglasses but for cars.
Protects Headlights from Scratches and Yellowing
Film tinted headlights protect the car’s headlight lens from scratches, fogginess, and yellowing caused by UV rays. They also prevent dimpling and dings induced by wear and tear.
So if you’re particular about keeping your car scratch-free, consider getting your headlights tinted.
Are Smoked Headlights Legal?
The federal law doesn’t explicitly forbid the installation of headlights on cars, so they aren’t illegal in and of themselves. However, you still have to follow your area’s Visible Light Transmission (VLT) laws that apply not only to tinted headlights but also to tinted taillights and windows.
VLT measures the amount of visible light that passes through a lens. The higher the percentage, the lighter the lens tint.
The VLT requirement differs from state to state. It really depends on the individual conditions of the area.
For example, colder and wetter areas like Vermont have a VLR rate of 70%. The same is said in areas with strict car mod policies, like California and New York.
On the other hand, states with constant sunny and dry weather like Colorado and Florida have a VLR rate of 27 to 28%.
As such, it’s really important to check the laws in your area because VLR laws can vary significantly. And if you’re planning to visit another state, it doesn’t hurt to check the state’s VLR requirement.
With that said, they all follow the same set of standards: the tinted lights must have enough capability and reflectivity to drive in poor lighting conditions, at dusk, at night, or during heavy rain. It also must be bright enough without the risk of glare.
How to Check the Headlight’s VLT Value
To make sure you’re following your state’s VLT laws, you’ll have to calculate the headlight tint percentage. Don’t worry, it’s super easy!
First, check the tint percentage of your headlights (if any). Then, multiply it by the VLT percentage of the film you’ve applied or going to apply and divide by 100.
Here’s what the equation looks like:
- Headlights tint % x film tint % / 100 = VLT %
So, if your Factory VLT is 80% and the film VLT is 40%, the final tint percentage is 32%.
If the tint is sprayed or if you can’t find the VLT percentage of either the headlights or the film, use a tint meter to check the percentage.
Conclusion
There you have it, folks; my step-by-step guide on how to smoke headlights with either tint film or spray paint!
Both methods are fairly straightforward, but if you’re a beginner, I recommend smoking your headlights with tint film first. If you make a mistake, you can easily take it off and start anew.
But if you’re handy with paint and DIY, absolutely go for the spray paint option. It looks cleaner and more elegant than tinted films.
Good luck!